Monday, July 9, 2012

London Calling!

time to break out the ol' sewing machine. for a girl's weekend, i decided to make my friends each a tote bag. with the theme of the party already decided as a celebration of london, i went on a search for london/england themed fabric. i ended up finding four different designs from a company just outside of london , one of which i used for a table runner which i will post soon. i found three designs that worked perfectly for making the bag. i didn't use a bought pattern. i looked at other tote bags i had and began to plan and design. 

i was able to make two tote bags per yard. the final cutting measurements were 22 inches across and 19 inches tall. the straps, depending on the length you prefer, were two yards long, each.  it took on average three days to complete each. since i am a bit of a perfectionist when it comes to creating and designing stuff, i was measuring all the time... making sure not to have a crooked seam, a slanted side, odd pattern placement. i also always had an iron on hand to make sure everything was nice and smooth and that the seams turned out nicely, especially when i did the straps, which were the most difficult part to accomplish.  i did add a liner for each bag, to add protection the patterned fabric itself and to add some stability to the bag. 


the final products came out perfectly. i still have yet to make myself one. the girls loved them. i added these craft tags to the bags, so when i handed them out, i knew who got what bag. they are 100% cotton so easily washed on the gently cycle. i was very happy with this project, considering it was the first time i had a used a sewing machine since middle school home econ class. 

Monday, July 2, 2012

Mason Jars 'n Lights

my next project was in the hopes to create a fun and inexpensive centerpiece for an upcoming event.  i had seen all these neat parties and wedding table settings using mason jars. i decided to jump on the band wagon and try it out myself. the first thing i did was head to our local flea market. it's only once a month but it's fantastic! i found these six jars. the light blues ones are the toughest to find, they were produced before 1937. it is even more difficult to find the zinc lids. i was able to bargain and get the two large one for $2.00 a piece. some vendors had them at around $20-$25.00. 

after washing each jar out, i had went down to my local craft store and bought some pearlizing spray paint and silver glitter spray paint. i also bough an inexpensive jar to test the paints. using the paints outside, i did three types of spray tests. i did one where i painted layer upon layer of pearl paint to create an opaque finish. i did another where i did around two layers and the last i did about 5 layers of glitter spray paint. the pearl paint was easier to use and dried a lot quicker....the glitter paint took a while to dry and liked to drip all over the place. i even decided to spray the metal rims of the lids, again the pearl was easier to work with over the glitter. 

i had originally planned to just use the jars as vases for flowers, but i found some flame less tea lights and decided to use a few of those. they turned out fabulously. i've decided to mix the jars as vases, tea light holders and photo holders. i'll post some pictures after the event to show you guys the final outcome of my centerpiece. i will not be painting the older jars, in particular the blue ones. they are too pretty without it and since they are so rare, i'm going to preserve them in their original condition. i did find one mason jar from canada from 1959, which was gorgeous. i will not be painting this one either. i'll post more pictures as my days of planning progress.

Sunday, July 1, 2012

Fun in the Sun- Flip Flop Invitations

for this project, i was hired to create an invitation that would include mailing the invitation in /on a pair of flip flops. it was for a double birthday party for two little girls turning 8! i had three different size flip flops, in four different designs. instead of just attaching a square card to the flops...i ended up drawing the foot myself and the toenails. using my design program, i colored the nail polish and foot to match the colors of the flip flops. after cutting out each invitation, i punched a hole between the toes and wrapped it around the thong portion of the flip flop. i tied the flip flops together with two different colors of grosgrain ribbon. i bagged them up by size and sent them on their way to be packaged and shipped. the whole project took about 4 days. the flip flops were order in bulk, about 75 pairs. each guest ended up with a pair of flip flops to bring to the pool party and an extra little favor before they arrived. 


High Heels and Wine!

as a gift for my friend, who had a birthday...an acceptance into flight controller school and who always hosts wonderful little get togethers...I decided to get here a little something that would represent the fabulousness that she encompasses. i found this extra large high heel shoe which was a wine bottle holder. it was a sparkly, red stiletto peep toe...is there anything better?! i then found a fun summer wine, with bottle colors that matched the heel. i held it all together with a large white satin bow. 


Sunday, June 17, 2012

Britain is the Best!

in celebration of the fun events england has been and will be holding this summer (the diamond jubliee and olympics), i used this countries flag and heritage as inspiration for an invitation for a girl's weekend. i used a distressed union jack flag as a back around, placing a die-cut text box on top to fit my information. i then added a vintage crown, with a sparkly gem to add a little flare to the invitation. i went through many drafts, since i couldn't pick a font or color scheme to save my life. i made the invitation the center of a red folder, adding a direction card and information card to the bottom pocket to complete the look. the fonts i used were: castellar and chopin script

Monday, May 21, 2012

Graduation from GW

this was my favorite gift to wrap up. this was the first idea that came to me. the tag reads 'hail a taxi, a spade marks the spot'. the graduate loves kate spade. so all wrapped up in  yellow wrap with black and white checkered ribbon was a kate spade pouch, the print of which is a map of new york city with a spade marking the location of the flag ship store. 
for this particular gift, the graduate was graduating from george washington and will be attending n.y.u in the fall, so i tried keep with the theme of new york city. i bought separate gifts, wrapping each gift differently, each reflecting the graduates personality and future plans. 

as an art historian i have to promote a trip to one of the greatest museums in the world. i had a map and information pack on the museum, which i added to a picture from the kate spade collection.

this gift wrap slightly hinted at the gift inside, the only clues being the vintage , sparkle pin and address.  the gift was 'breakfast at tiffany's', a must-see before a trip to new york. 

i found this amazing vintage new york city wrap which had a vintage image of n.y.u. which worked out fabulously for this gift. you'll notice i have made tags for each gift. this one in particular is a white embossed 'congratulations', which i stamped on a navy card. 

finally, i wrapped the gift in kraft paper, topping it off with a navy ribbon with white polka dots. the school  colors were navy and buff, however knowing all the gifts in side were quite vibrant and detailed, i kept the outside quite simple. i made the tag using the school mascot, mounting it on silver and white card stock. with a congratulation message on the back. 

Thursday, May 17, 2012

A Peachy Mother's Day


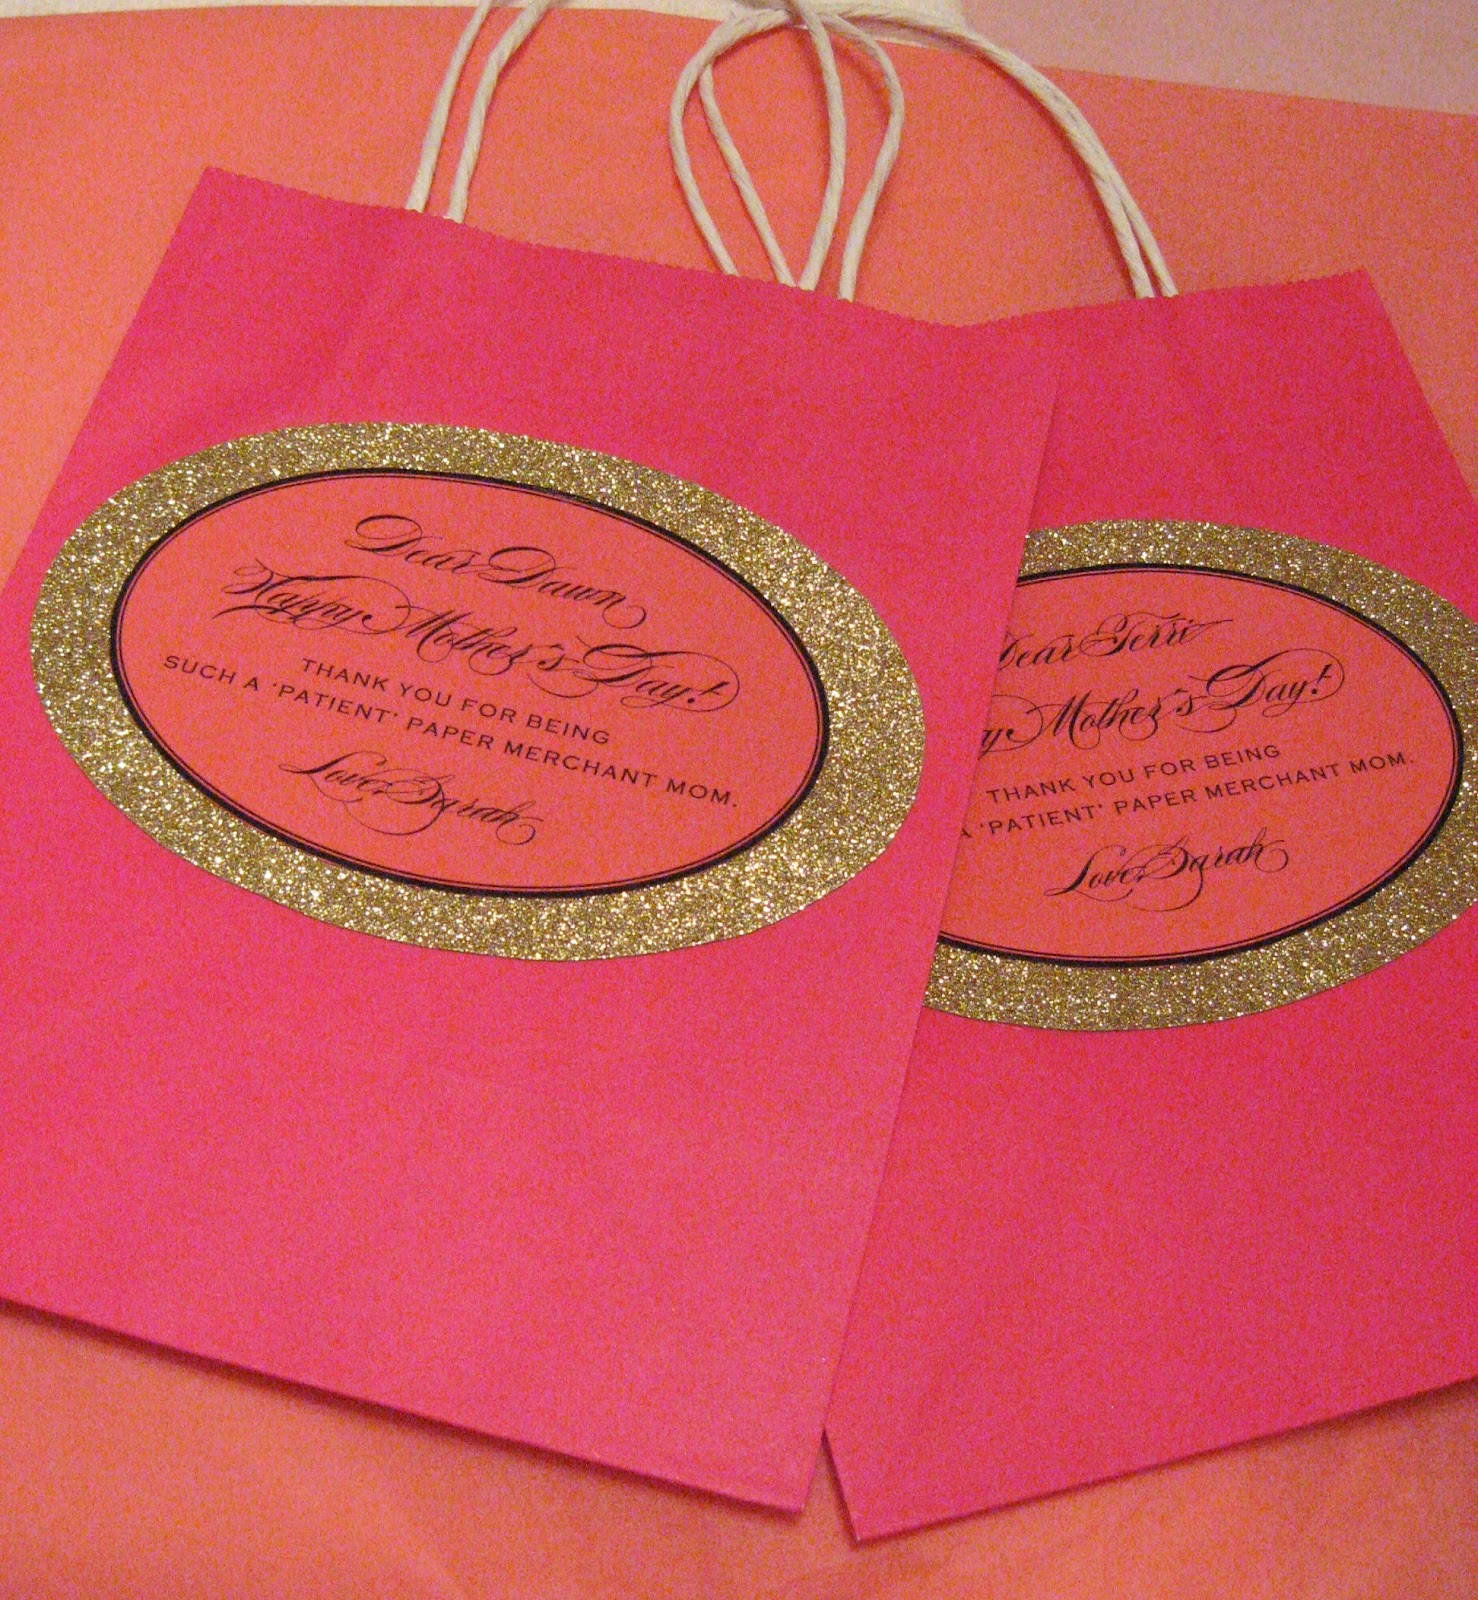
for the ladies i work with, they are like my second mother's. they always take care of me, offer advice and make me laugh. so every year for mother's day, i give them something special. this year i decided to give them each a flower, an apricot new guinea impatient to be exact...for being such 'patient' mothers to me.  i bought rosie, pink paper bags, with a wide bottom so the flower could sit in the bag without getting squished. to keep the dirt from getting everywhere, i sat the flower in a small zip lock baggy, then wrapped two layers of pink and peach tissue around it.  to secure the tissue, i used some thin, white satin ribbon. i made a tags for the bags using my design program, my favorite fonts and some glitter paper. i used paper mod podge to secure the tag to the front of the bag.  i topped off the gift with some fuchsia satin ribbon.